Victorian Coffee

19 May

I love coffee, but I am a major wuss so I settle for novelty brands (Baskin Robbins’ Cappucino Blast…mmmm). My husband can attest to all the situations in which an argument has subsided with one phrase: “Let me get you some coffee”. He is a dream, no wonder I married him ;).

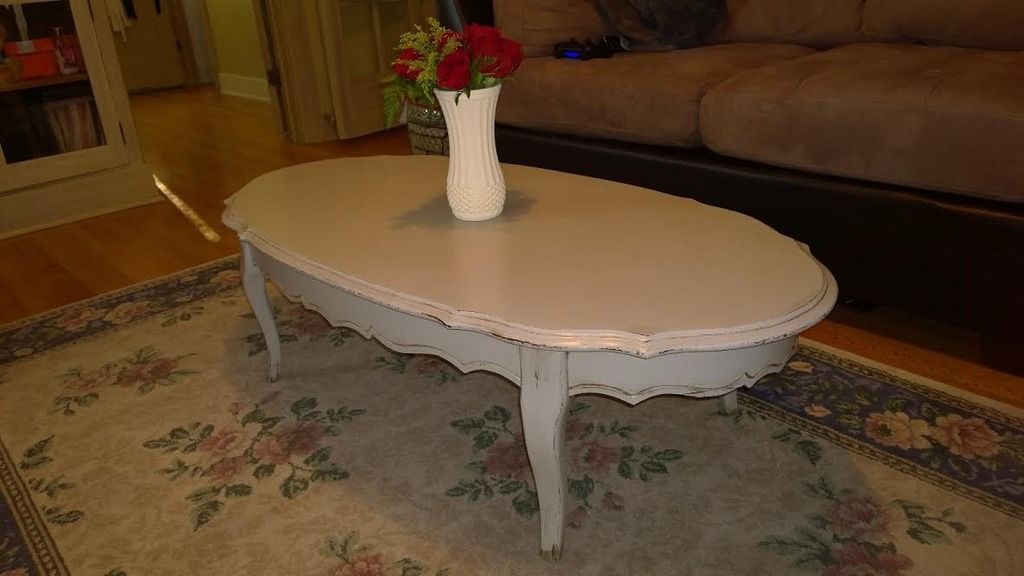
Today, I wanted to share a coffee table that I painted with Annie Sloan’s Paris Gray.

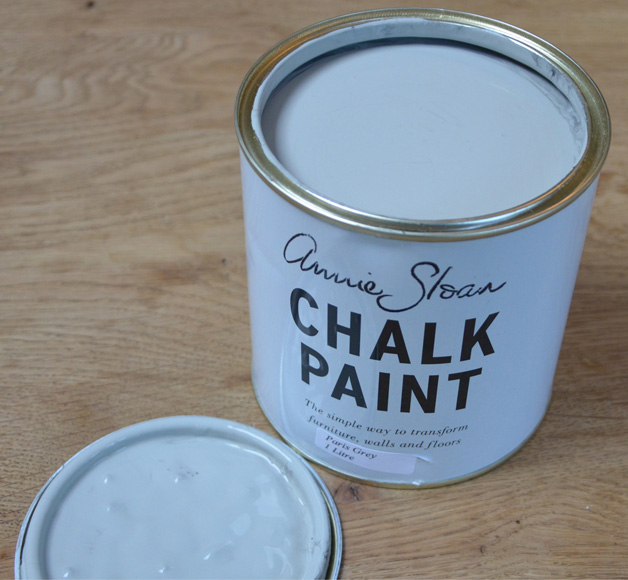
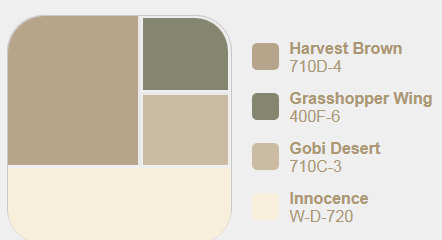
I compared this color with Behr’s Sparrow according to this chart here. It turned out to be a perfect match! Now I know where to get ASCP colors without the price tag.

On with the story, I found this table on Craigslist for $20. It was initially meant for my living room, but upon seeing it in person I found out that the table was too short.

I decided to take her home anyway, because i knew she had potential. Plus her curves were too pretty to pass up.

I decided to mix some of the Paris Gray with Old White because I wanted a delicate grayish cream color.

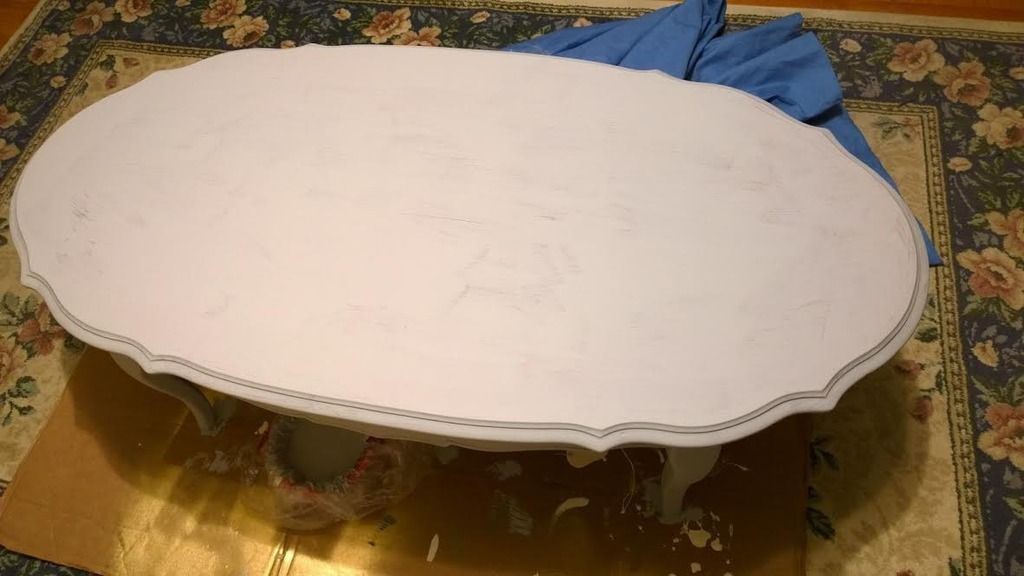
It went on so beautifully! A very light grayish blush.

It’s so funny because during this entire time I got my husband to paint some of the wire tubings that we recently purchased for our place. It was a fun bonding experience, who’d knew?

Since chalk paint dries so quickly, I was able to distress her within one hour.

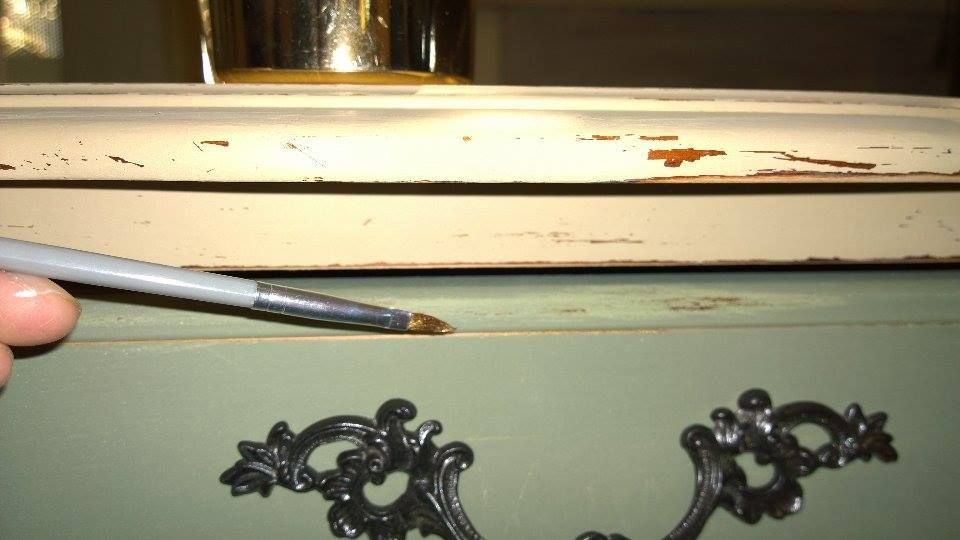
I used 220 grit paper and started to sand while the paint was still soft.

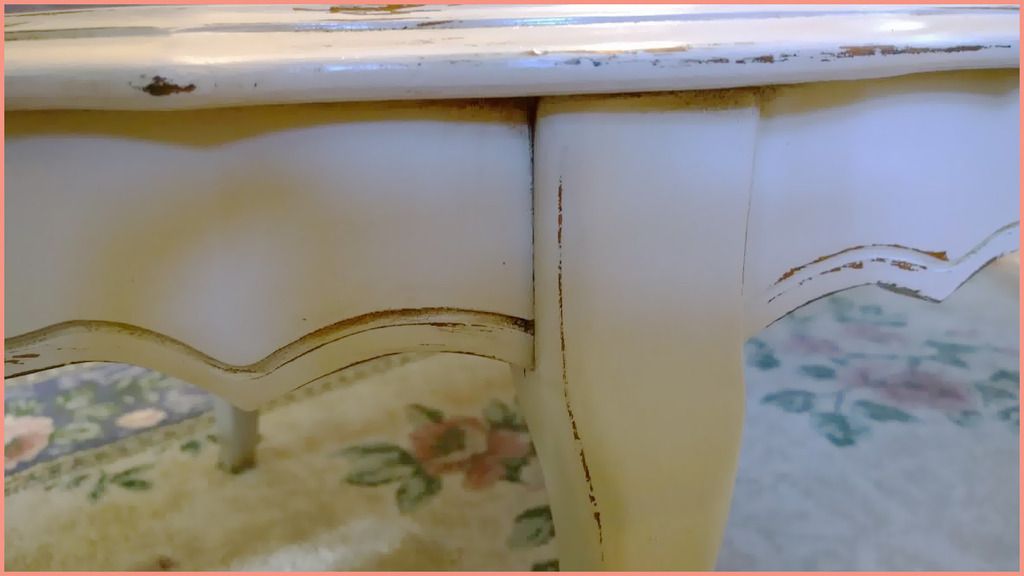
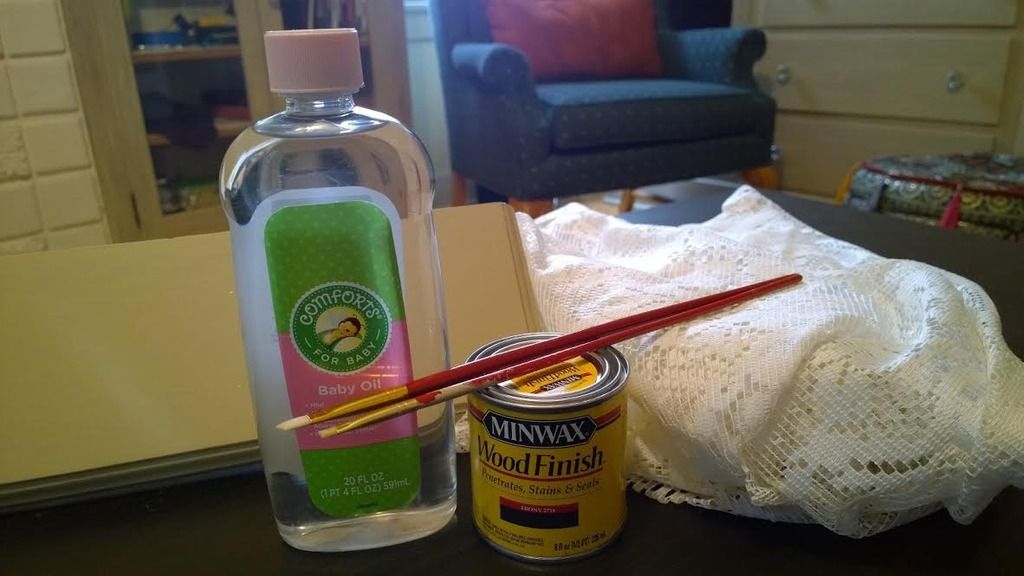
So at this point, I wanted to try something a little different. I read on this blog, that you can use baby oil and wood stain to achieve a distressed look while maintaining the original color. Let’s just say I tried this technique and it was a major disaster for me.

I had no idea how much stain I needed to apply, how long to wait between wiping, and how much to remove. Either way, I will probably try this method again but with a lighter stain color.

Beginner Tip #1 NEVER.. EVER sand your table in a circular motion. I made this horrible mistake when sanding the edges of my table, and after using the stain, it crept into the wood and left a dark gray color that is very noticeable! Always sand in the direction of the grain, I don’t know why I didn’t do this to begin with.

Beginner Tip #2 Unless you are going for a super chippy look, try to hold off on over-sanding and distressing. The results could be disastrous and unnatural.

Seeeeeee? See what happens when you go overboard? It looks unnatural.

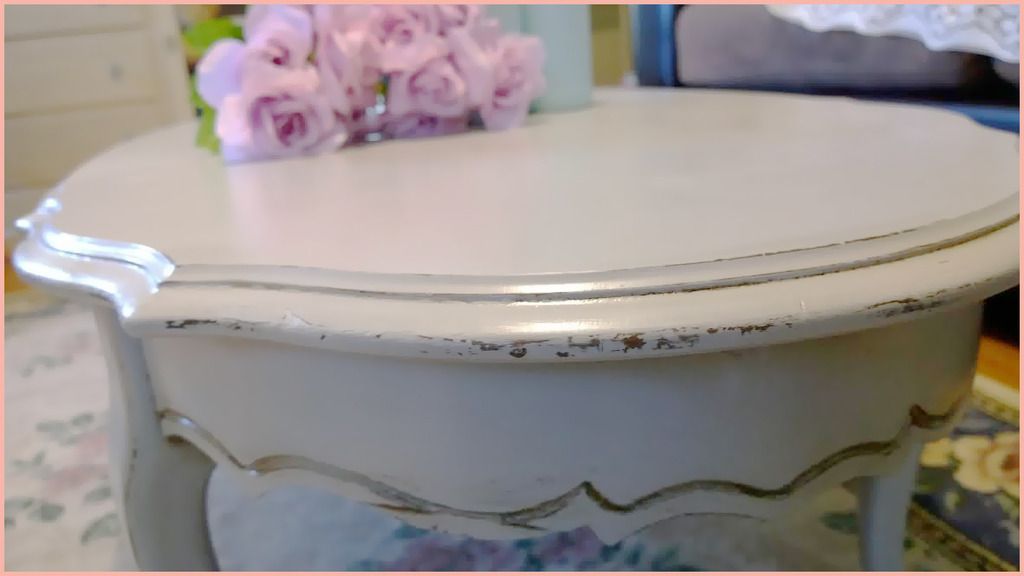
And here is the finished result.


Midas Touch

19 May

Today with the help of my husband I was able to give my PS4 controller the golden touch. Now I can play Destiny while getting the royal treatment. 😉

I used Rustoleum’s metallic gold spray paint.

New Love

18 May

When I first discovered furniture painting, my mind didn’t immediately go to all the crazy things I could refurnish in my house. Instead, I thought about all the sad lonely items that are thrown away, discarded, and destroyed each day in our country. Items that could have otherwise been renewed, redeemed and revived. The idea of transforming something old into something new again gave me a strange kind of hope, perhaps I was projecting myself a little bit through my art projects? Either way it is a beginning of a journey that has brought me a lot of happiness and satisfaction. It is no longer just a weekend hobby, it has become a passion of mine. My house has become a haven for homeless furniture, my clothes are covered in paint, and my porch is cluttered with paint brushes. Yet being the neat freak that I am, I find myself enjoying the “artistic” mess.


This was my first project, a sad lonely table that had beautiful shape. I was rather nervous at first, I have no idea what I was doing! Either way, I just told myself to paint and so I did.

I mixed up my own version of chalk paint using the 1 plaster of paris to 2 paint ratio. The color went on so smoothly and finished so cleanly that I knew this would be my default technique.

I decided my colors were going to be Harvest Brown for the body and Grasshopper wing for one of the drawers. It’s funny because there is technically only one drawer while the other one is purely for show. I had to use tape to separate.

By the way, I’ve discovered that DIY chalk paint dries extra fast! This table was ready to be distressed within one hour. Amazing.

I was impressed by my taping skills the very first time, go me!

I used Rust-oleum rubbed bronze spray paint on the handles!

After everything was dry, I started to distress the table and drawers with 220 grit sand paper. I wanted to try something different instead of making both drawers the same.

The next day I sprayed some gold metallic paint into a can, and using an artists’ brush, I carefully drew some gold lines on the handles and the distressed parts of the table.

This made it so that when the light touches certain distressed parts of the table. It would give off a golden gleam. I am obsessed with anything gold so this part was totally necessary! 😉

Here is the resulting table!