Quick update, my mom found these dirty frames when cleaning out her garage. I LOVE gold anything and these things had little ornate details that I knew could transform into something cute.
So dirty and gross!
First, these were covered in cobwebs and dirt, so a much needed scrubbing was my priority. I filled up my bucket and with some water & soap…I managed to get some of that yuckiness out. =P
What a difference! =P
So to prep, I decided to prime the frames with some 1-2-3 Primer I bought from your local Home Depot.
I then started to paint with Glidden’s “Winter Mauve” on one frame and Behr’s “Indiscreet” on another.
I allowed the frames to dry over night. The next morning I started the staining process; I’m still new to this staining thing but after my last project I have started to gain a little more confidence.
With an artist’s brush I applied the stain in little nooks and crannies, making sure to apply heavily in the moldings and corners.
After applying, I allowed the stain to “sit” for over a minute. Then with a lint free rag, I wiped off the excess using circular motions and light pressure. =D
I applied more stain on the outer edges to create a dimensional look to the frames. Once everything was dry I used a small painter’s brush, whipped out some metallic gold paint from Ralph Lauren (I used Parlor Gold). And painted the gold on to the moldings.
Parlor Gold by Ralph Lauren
For these frames I had in mind to use them as chalk boards, so I ordered some 8 x 10 glass panes from a nearby store. I applied primer to the panes and applied one layer of chalkboard paint. The finishing product? Fantastic!
My favorite morning ritual consists of sitting alone in a quiet meditative state, next to my window…on a gray dreary morning. Sipping coffee from my favorite cup, and perhaps reading the news off my phone.
A week ago I read two separate articles on how Asians “lacked imagination” and are generally “not very artistic” (their words). Both pieces were from two separate but very reputable agencies, making me think that perhaps Asians get the sloppy seconds when it comes to first impressions. Being so, I couldn’t help but feel that it placed a bit of a dent in my morning. Either way, I shrugged it off and focused on my passion: refurbishing!
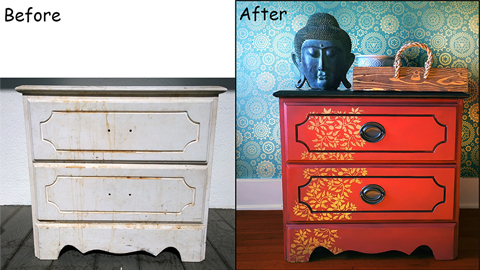
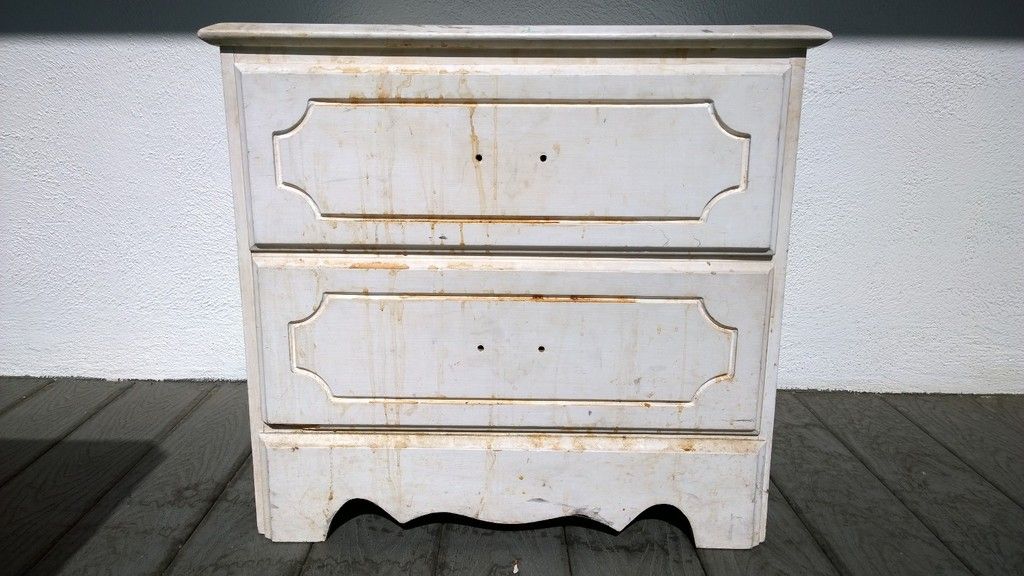
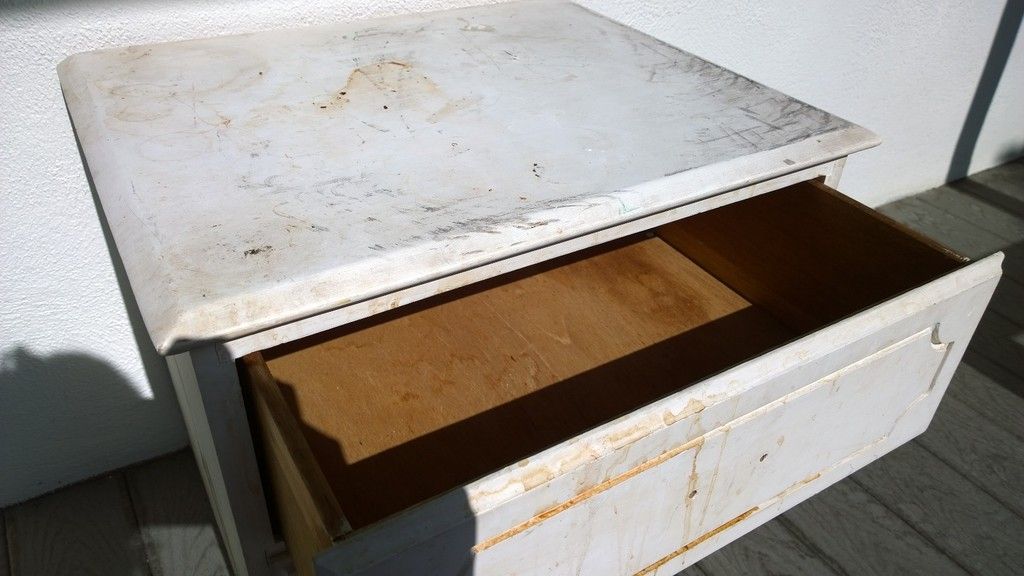
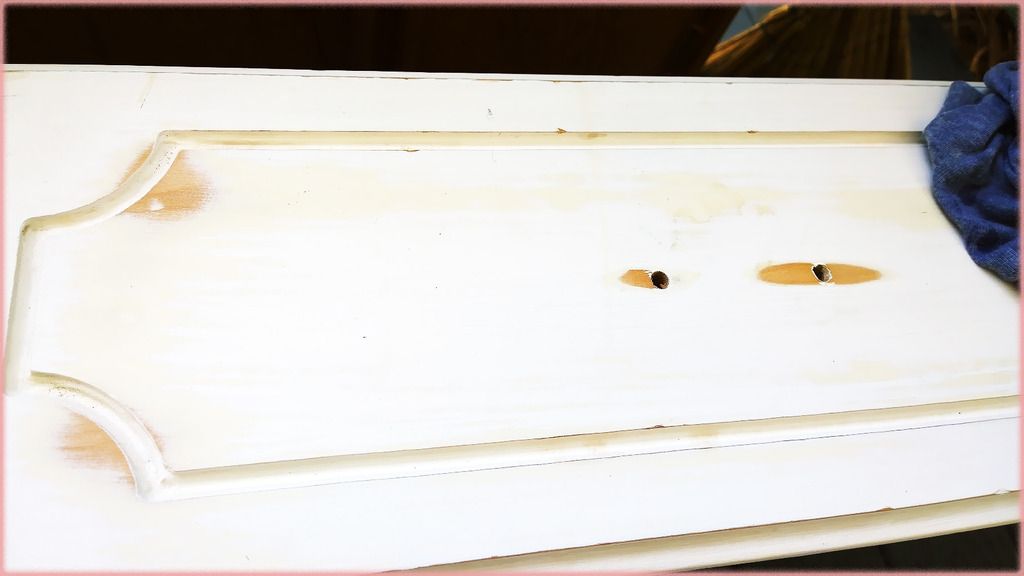
So I found this night stand sitting isolated on my street, someone had completely ruined it with cigarette marks, crayons, some coffee stains, belt marks, and dark holes. They left her out for the trash so I guess it is up to me to save her! =P
It’s covered in some gooey brown liquid…EW!Lots of weird black marks
I couldn’t even touch it, no I made my husband carry it LOL.
So the first order of business was to clean the crap out of her. She was so dirty she almost made it stylish haha. So I brought out the hose, sprayed everything down and with a bucket and some soap…I used a wire sponge and started to scrub. I tried to get all the dirt and yucky stuff out of the crevices and sprayed down the areas that were inaccessible to me. It was tough, I am talking dried glue..gum, dead insects…I swore it was like a museum packed into this tiny little night stand.
I allowed for her to dry for a few hours then I whipped out my random orbital sander and proceeded to sand off all the leftover marks and little raises in the paint.
Sanding off all the little nicks on the drawers
I took my sander over the entire dresser, applying very little pressure and using 220 grit. This was my first time using an orbital sander so I was afraid of using anything too coarse, I didn’t want to destroy the night stand lol. Luckily I found it to be very easy to use, the machine practically did the work itself! In retrospect I could have gotten away with 100 grit if I wanted to.
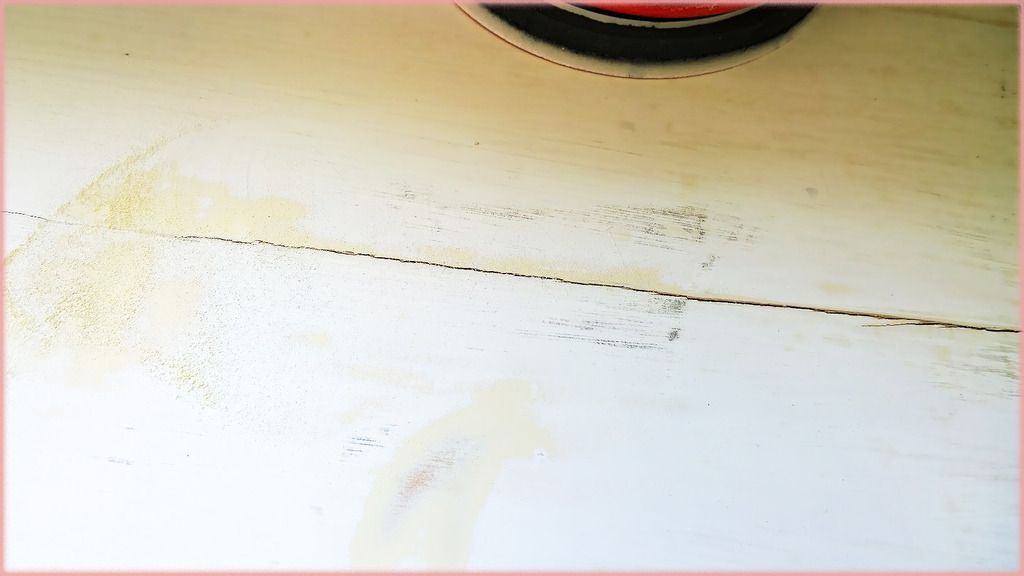
There was an area on the side that had a large crack running up from the bottom. I was watching Restoration America (or something) and learned that I could use the sanding dust from my project mixed with a bit of glue to act as a filler. So never passing up an opportunity to try something different, I decided to do just that!
Large crack running up the side!
Some glue and sanding dust to use as a filler!
I filled her with a bit of glue, and waited to dry. Then sanded off the build-up until the area was smooth again. It worked perfectly! I couldn’t tell there was ever a dent there! =]
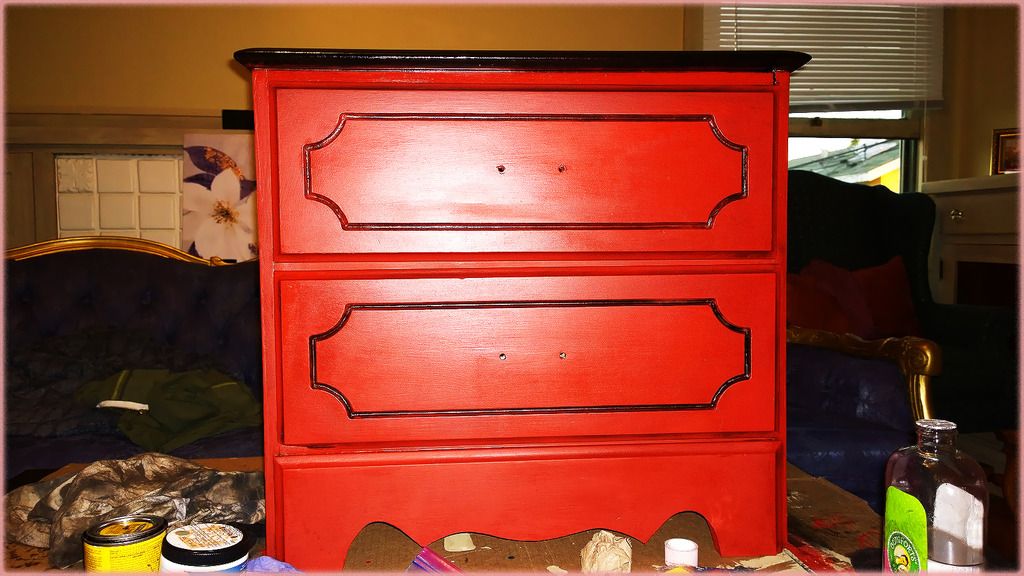
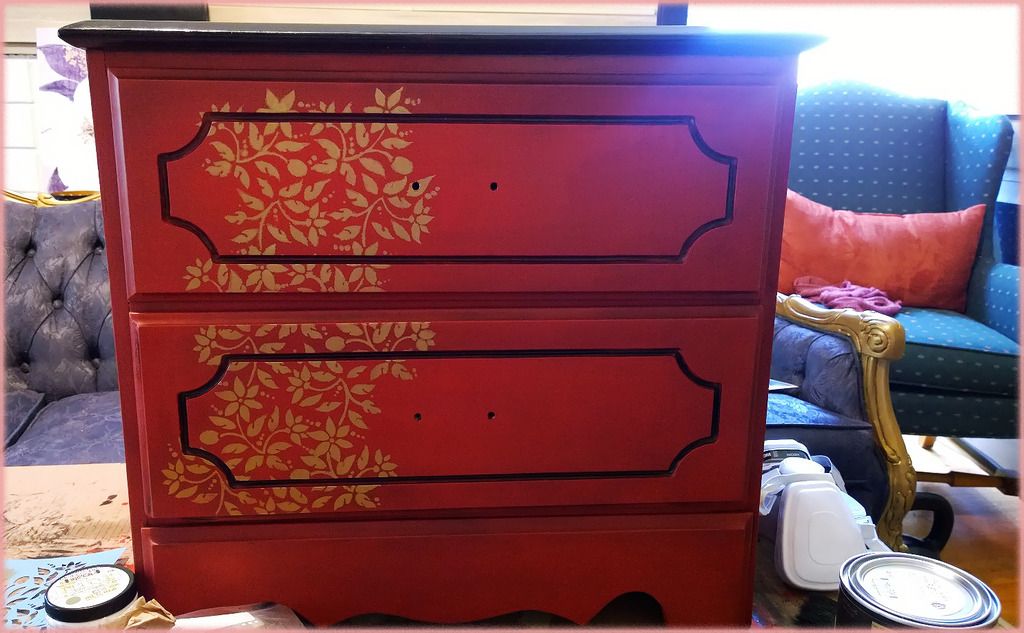
Once I wiped everything down with a tack cloth, I started to apply my first coat of paint. I used Graphite as my base coat, then applied 2 layers of ASPC’s Emperor’s Silk. I was inspired by antique Chinese furniture, something rustic but modern.
Lookin good!
I loved that the black base coat was showing through a little, giving the red a darker contrast in some areas. Instead of using dark wax this time, I decided to Stain this piece. I’ve had a bad experience using stain in the past, but I am not one to be deterred (trust me). So I decided to try it again this time, and it was a MAJOR SUCCESS.
I allowed the stain to settle into the nooks and crannies on the drawer. Wiping off using baby oil in areas that I wanted to highlight, such as the center of the drawers. Working in a clockwise motion, I wanted everything to get darker as the stain migrated away from the center. Generally I allowed the stain to sit for no longer than 30 seconds before I started to wipe it off, honestly you have to work quickly or it will dry fast. Use baby oil to remove!
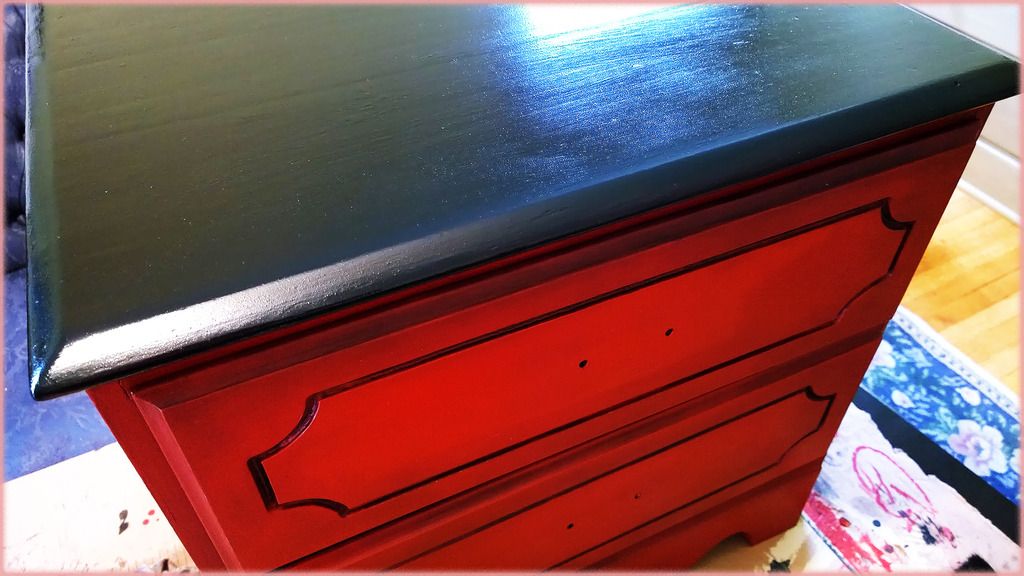
I stained the top of the night stand and let it sit.
I left the stain on top of the nightstand for 3 days!
On hindsight I should have just painted it black, but I wanted to experiment with the results so I left the stain on top for 3 whole days. It took that long to dry (you don’t want to apply poly to wet stain). It smelled horribly but left a shiny finish. I love it.
After staining, I decided to stencil gold flowers on the front, it was my first time stenciling also and I was horrible at it! The colors seeped through to the bottom and left weird blotches! I was using a roller instead of a stencil brush so that was a total mistake, I also allowed my brush to get too wet.
First time stenciling
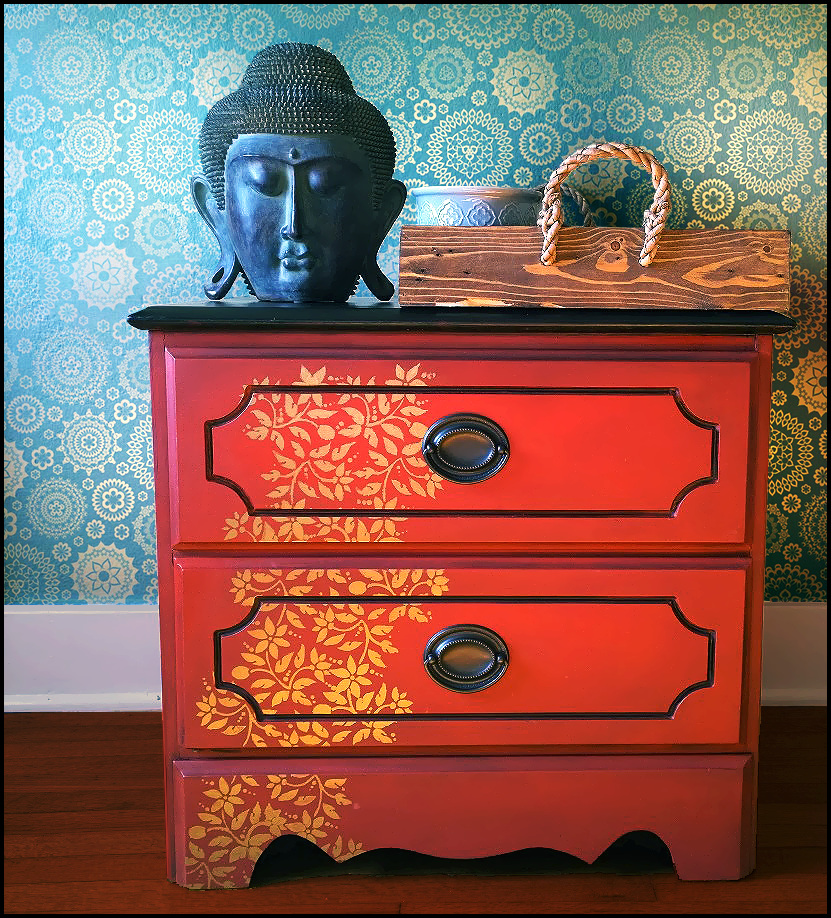
Either way , there was a lot of washing off and re-applying involved. Luckily, I got better at it and decided to finish the gold leaves by hand, it eradicated the fuzzy lines.
I had some left over paint that I needed to get rid of so I painted the inside drawer green.
To finish things off, I grabbed some handles at home depot and threw them together.