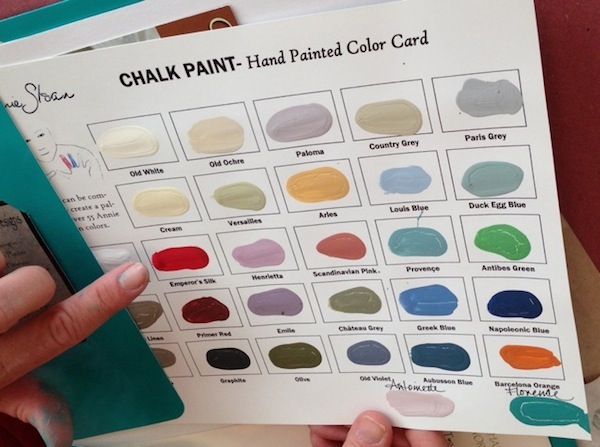
I love Annie Sloan paint, however I am not always a fan of her prices. Chalk paint is currently the “in” thing these days, but after using her paint and creating my own DIY mixtures, I really do not see a difference. Honestly, whip up a batch of Plaster of Paris with any of the Behr colors that match ASCP’s and put them side by side…the difference is nil to nothing.
I know there is already a list out there that matches Behr colors to Annie Sloan’s but I realized after doing some research that the list is A) outdated B) the colors are not precise and do not match.
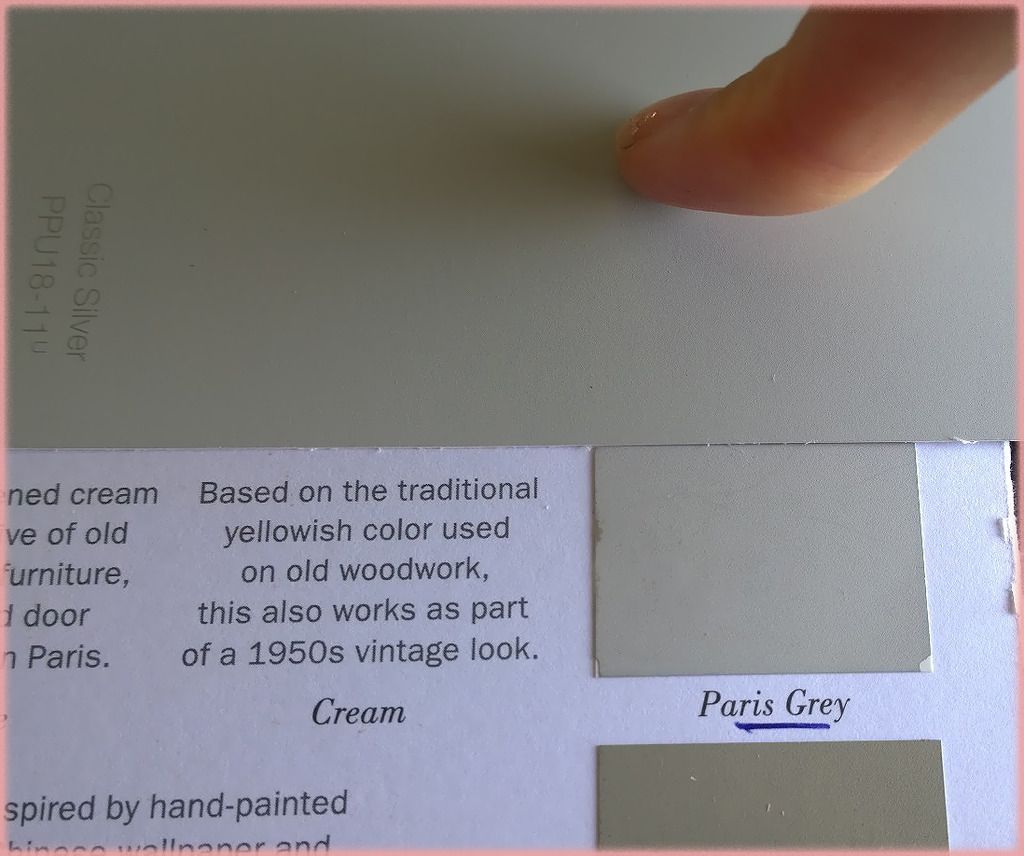
I wanted to do a very thorough and close match to ASCP’s colors. The colors I’ve researched are not just “similar”, they also match undertones and overtones. Thus, the colors are as close to authentic as possible.
Pardon my finger haha
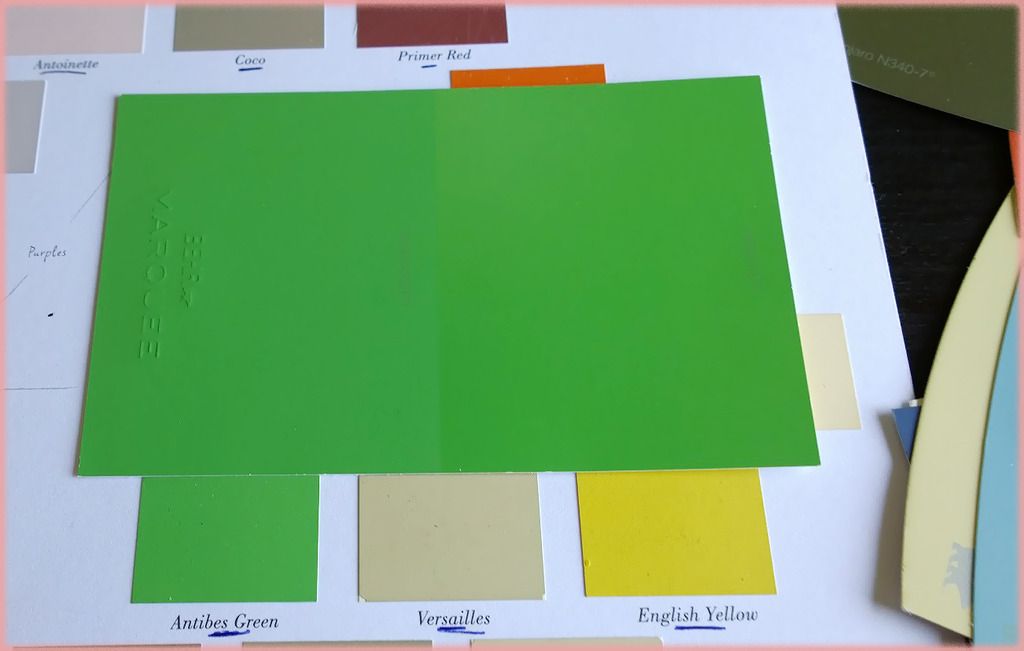
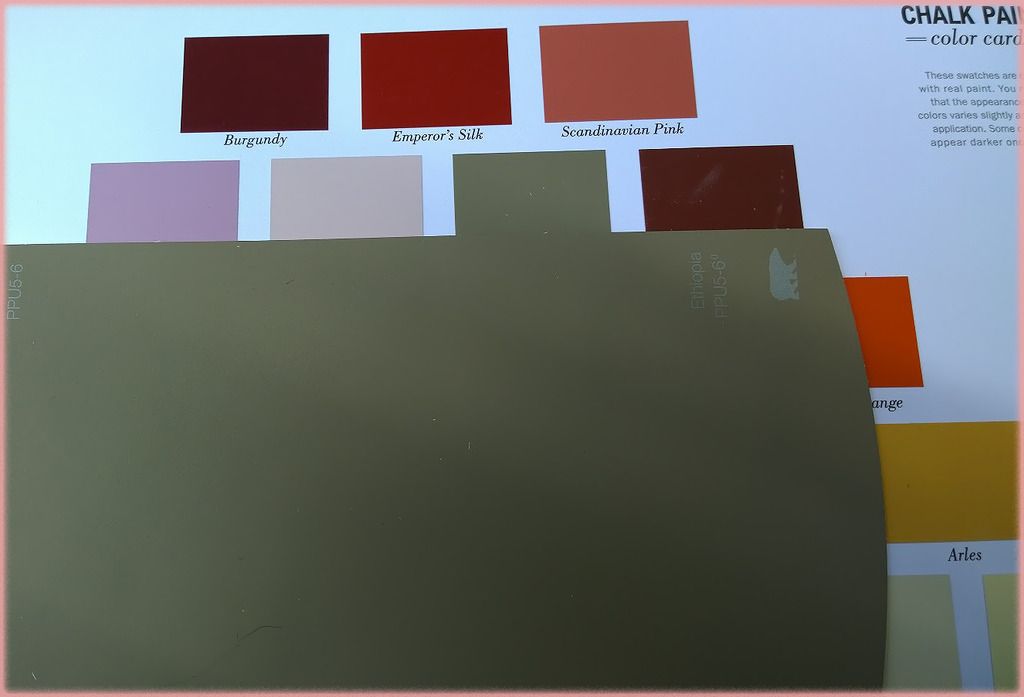
Antibes Green matched with Behr’s ParakeetASCP’s Coco matched with Behr’s Ethiopia (camera lens makes it look a little green, it’s actually brownish cream).
In some cases when a Behr color is not possible, I matched it with Glidden or Ralph Lauren paints. All three brands are carried by the Home Depot and are affiliated with each other. Home Depot can transform it into a Behr “color” by using their color match system.
**So for example the closest match to ASCP’s Barcelona Orange is Ralph Lauren’s Varsity Orange, you can turn it into a Behr Premium Plus Ultra brand by letting the associate know the name and number of the RL color. Simple!**
I hate wastefulness, I also hate knowing that I have not always been the best caretaker of our planet. I don’t always recycle, and I tend to drive short distances when I could have just walked. All those temptations towards instant gratification has definitely spoiled me ;). Considering the fact that I live in California where we are going through a record drought, I need to change my attitude towards certain habits.
One of the things that’s really important to know is how to dispose of toxic chemicals. Paint, especially oil-based, are considered toxic and hazardous to the environment. One should always be careful not to pour paint into the ground or directly into the drain (it could actually damage your piping system!). Oil based paint is considered flammable so you should never try to burn it as the fumes are not only extremely toxic but can also release contaminants into the air.
I use a lot of latex paint, which are water based and are considered non-toxic. However, some latex paints do contain a small amount of mercury which is hazardous to the environment. One should exercise caution not to pour liquid latex down the drain or into the ground.
So how does one get rid of leftover paint?
Reuse. When the paint I am using is not a DIY chalk paint, I store it in a dark cool place sealed with plastic and stored upside down. Sometimes I buy colors that I absolutely despise so I would think of ways to reuse them without forfeiting cosmetic appearance. ~~~~~~~~~~~~~~~~~~~~~~~~~~~~~~~~~~~~~~~~~~~~~~~~~~~~~~~~~~~~~~~~~~~~~~~~~~I like to save my unsavory paint colors to paint the insides of drawers and cabinets.Use left over paint for layering to distress.
…Or just little details and trimmings.
Throw away solid latex paint. When I am using DIY chalk paint, I usually mix it in a small container double covered with plastic bags and tightened at the top with rubber bands. This is so I don’t have to constantly buy new containers, and it also makes disposal an easier and simpler process. You shouldn’t throw away liquid latex but it can safely be disposed of in its solid form. Leave the paint outside for a few days to harden then once it has solidified you can safely throw it in the trash! =] ~~~~~~~~~~~~~~~~~~~~~~~~~~~~~~~~~~~~~~~~~~~~~~~~~~~~~~~~~~~~~~~~~~~~~~~~~~
I leave my paint outside for 2 days to dry.
Recycle your paint! I keep a small container in my cabinet filled with misc paint colors that I couldn’t dispose of or solidify. Whenever I am done with a project I would pour the leftover paint into this small plastic container, when the container is full I would drop it off at my local paint shop for them to dispose! ~~~~~~~~~~~~~~~~~~~~~~~~~~~~~~~~~~~~~~~~~~~~~~~~~~~~~~~~~~~~~~~~~~~~~~~~~~My disposable container to be recycled!
My paint store is Sherwin Williams, they are excellent at getting rid of your leftover paint. Just drop it off and rest assured that none of that toxic waste will be making its way into our food chain!
Recycle your paint at a local paint store!
Other Alternatives (that I haven’t tried). I heard you can also brush or roll the paint onto layers of newspaper or cardboard. When the paint dries, put the paper in the trash bin. Alternatively, you can pour the paint into a cardboard box and mix it with shredded newspaper, cat litter, or a commercial paint hardener to speed solidification. The box can go in the trash when the paint dries and the cans can be recycled.
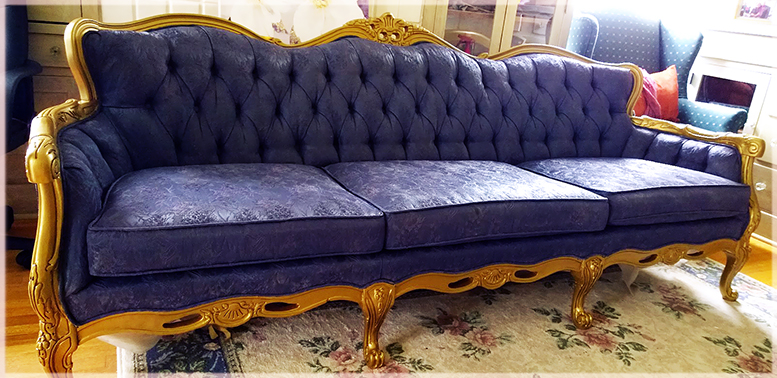
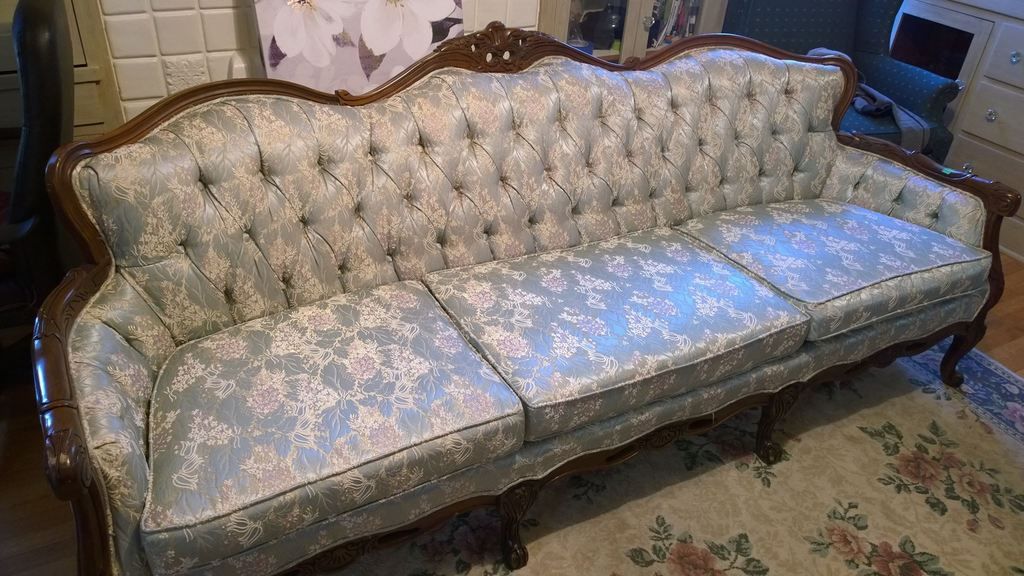
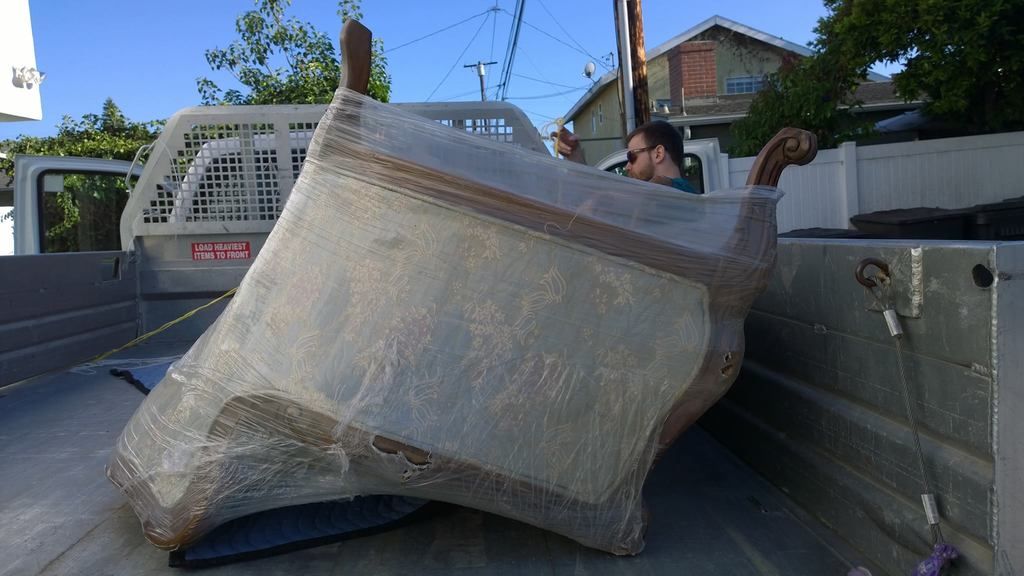
I was browsing Craigslist a week ago and found this gorgeous beauty. The previous owner passed away and left her estate to the children; the kids were frantically trying to auction off 6 acres worth of furniture all awhile trying to take care of their ailing father. When I saw this sofa it was still wrapped in plastic, hidden away in a storage unit at some dark lonely place in Long Beach.
I absolutely LOVE Victorian furniture, it brings back memories of my childhood; days where I would cuddle on the sofa with my mom watching Gone With the Wind. I am a girly girl at heart, and it never occurred to me that I would one day work with furniture. I still feel that anything can be feminine as long as you add your womanly touches to it. ♥
So I managed to strike a deal with the woman who sold me this piece, my husband had that Friday off so we rented a truck at the Home Depot. YES you can rent a truck there and for a much better price than U-Haul. I absolutely hate that U-Haul had a million different fees that they don’t tell you about until AFTER you’ve returned their truck. Sometimes those costs can reach triple digits if you’re not careful, and don’t even think to call their Headquarters to file a complaint…you will be ignored and ridiculed. I will never work with U-Haul again.
So the deal with Home Depot is that you pay them a deposit fee of $50, and they charge you $20 for the first 75 minutes and $5 every 15 minutes after that. This is all taken out of your initial deposit, and anything that isn’t charged will be refunded. It took me a little over an hour to relocate my sofa from the storage unit to my house and it only cost us $20!
The husband packing up our sofa!
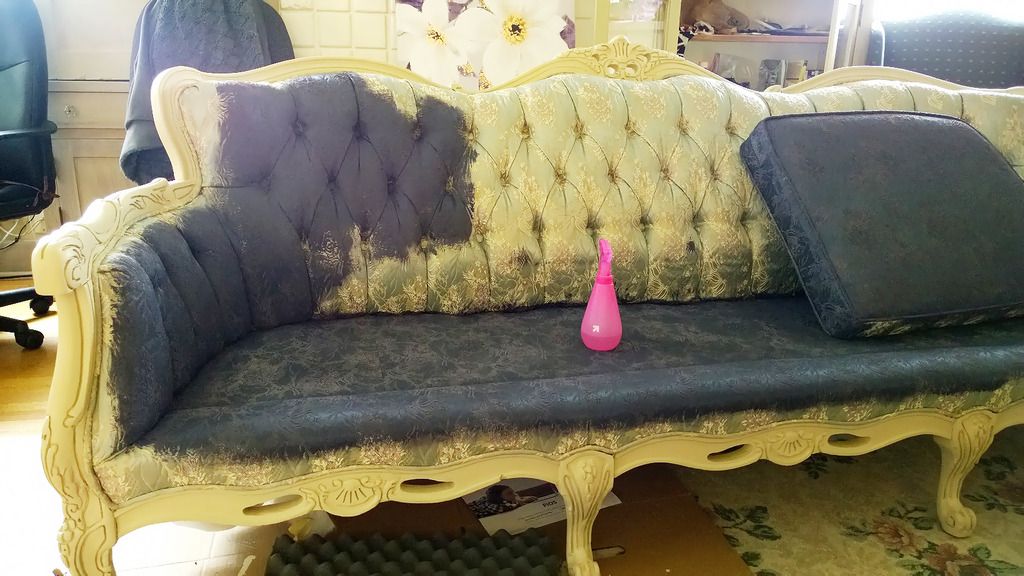
My plan with this sofa is to paint the wood in ivory and the fabric in a dark blue or violet. I knew going into this project that it’ll be extremely intimidating, but I figured the challenge will be fun. I never once painted on fabric before, so I wanted to be real careful with my first attempt. There are so many fabric paint tutorials out there so the real challenge was to shop for colors. It was supremely difficult to imagine what a small swatch of paint would look like on a large 3 person sofa.
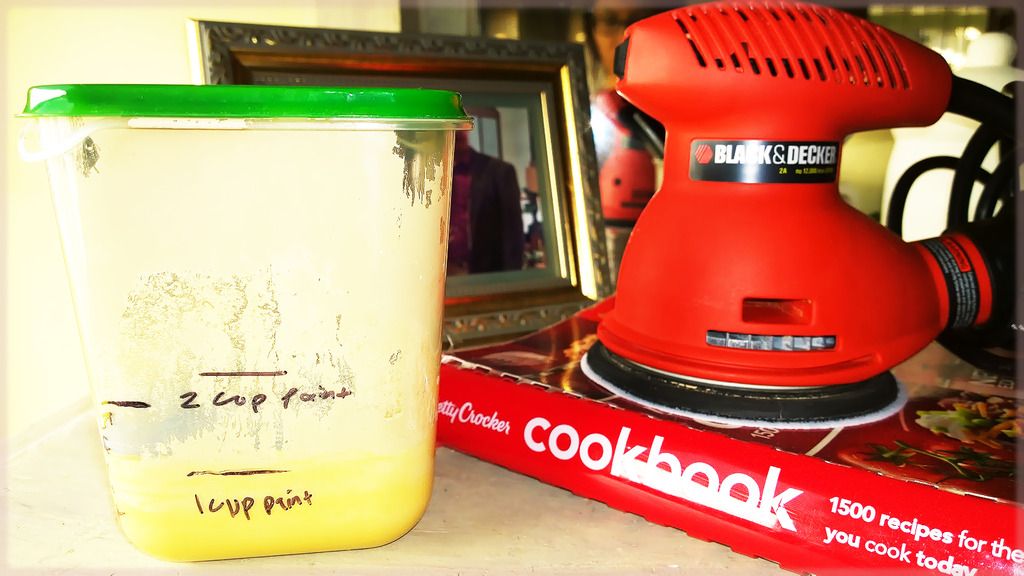
Red Bull and paint chips, just another day!
I didn’t want to use chalk paint on my fabric, I was too afraid that the chalky hardness would ruin the damask/embroidered surface. I decided on water based latex paint. My color? Knighthood by Behr.
Behr’s Knighthood
I absolutely fell in love with this color, it goes on like a soft navy blue with purple and brown undertones. I used a satin finish and it really brought out the shine on my fabric!
The process is pretty straight forward, here’s what I used:
♥ 2 quarts of paint. You NEED at least 2 quarts, probably more.
♥ A good paint brush (don’t use a cheap brush, trust me)
♥ Painter’s tape ♥ Fabric medium or hair conditioner (more about this below)
♥ Spray bottle filled with water
This was the only fabric medium I could find at Joann’s. This created lumps in my paint!
I could only find a few bottles of medium in my area, so I painted the back of the sofa without it.
My method was 2 paint : 1 medium : 1 water. Mixed into a container.
The color was lovely, and went on very smoothly.
I am not sure why, but the fabric medium I used created large lumps in my paint, sort of like corn starch when added to hot water (it won’t dissolve!). I didn’t notice at first but when I started to apply the paint, the lumps broke apart and created little white stains on my fabric! It was frustrating because I didn’t want to waste an entire quart of paint. I applied it anyway, and hoped that the second coat will make a nice cover up.
Start in an inconspicuous area first, this is the initial coat.
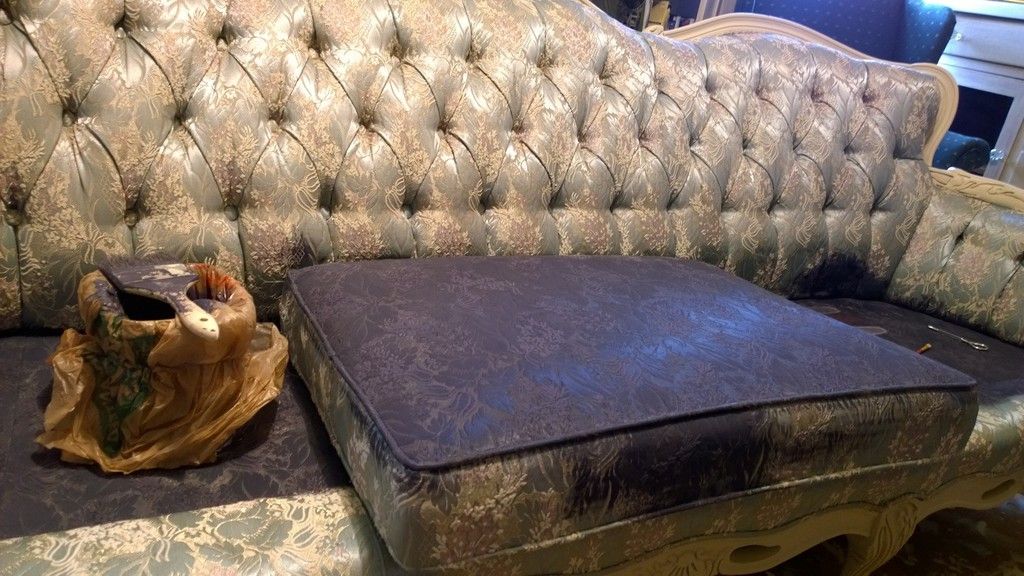
The paint actually saturated my sofa so well that I didn’t think I would need a second coat. Depending on the fabric of your project, it could take up to two or three layers of paint! Don’t be discouraged though, the end result is totally worth it.
Since my disaster with the fabric medium, I decided to substitute with regular hair conditioner. I bought something cheap and colorless at my grocery store and mixed it in with paint and water. I don’t know what to tell you, the result was amazing! It really softened up my sofa and didn’t leave a “crackle” effect.
I waited 24 hours after the initial coat. I didn’t think it needed a second layer but I applied one anyway just to cover up discolorations created by the lumpy fabric medium.
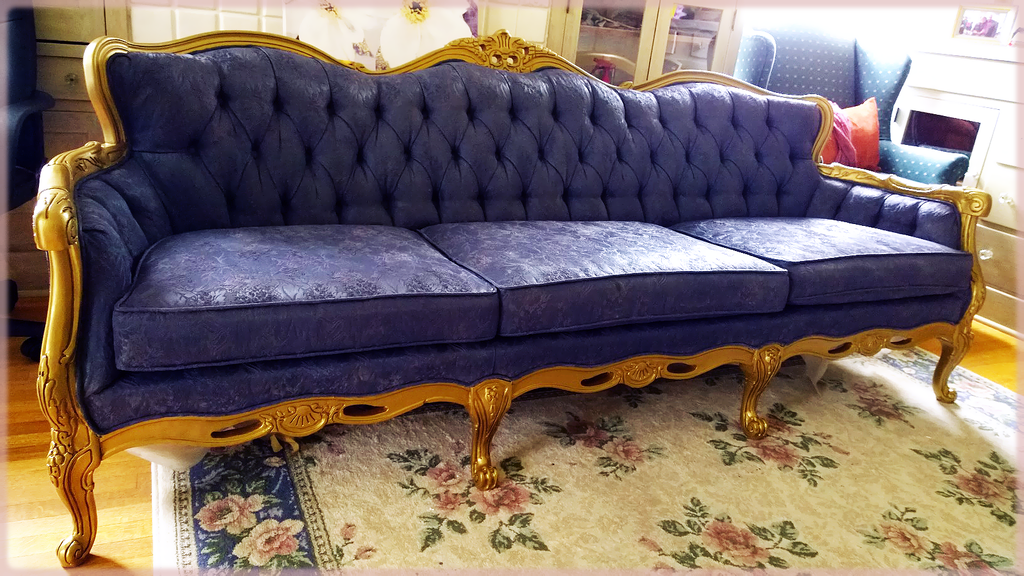
I then used soft wax over the entire thing to seal it up!
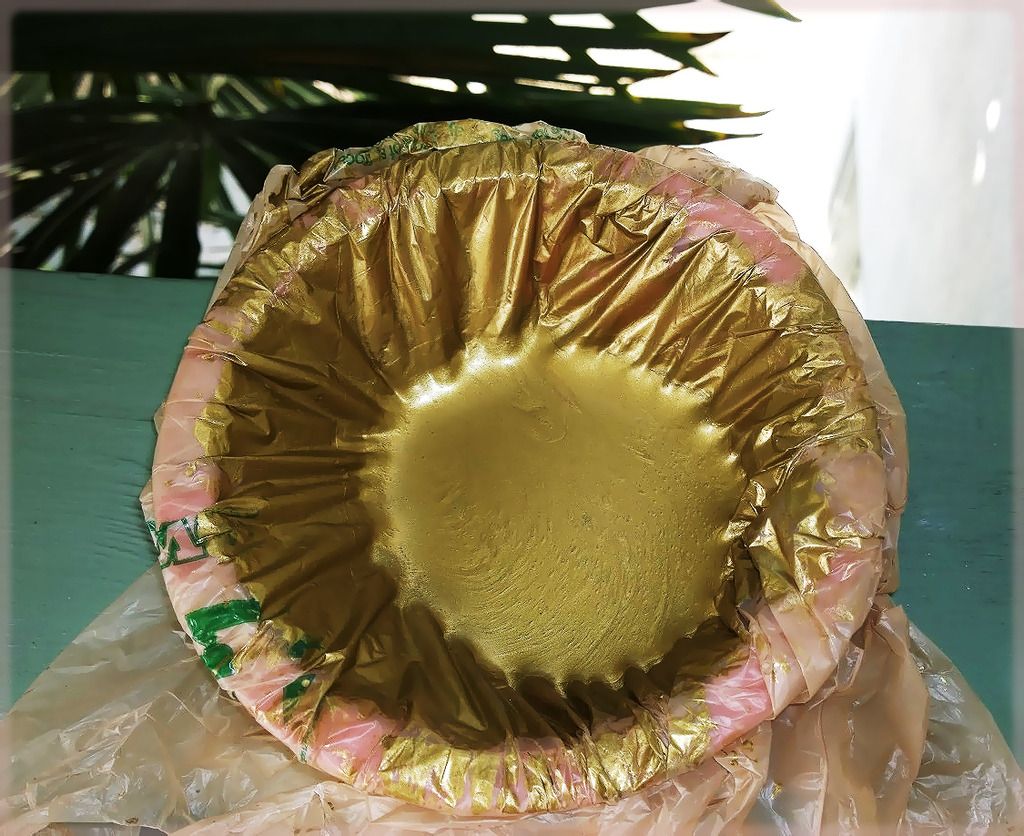
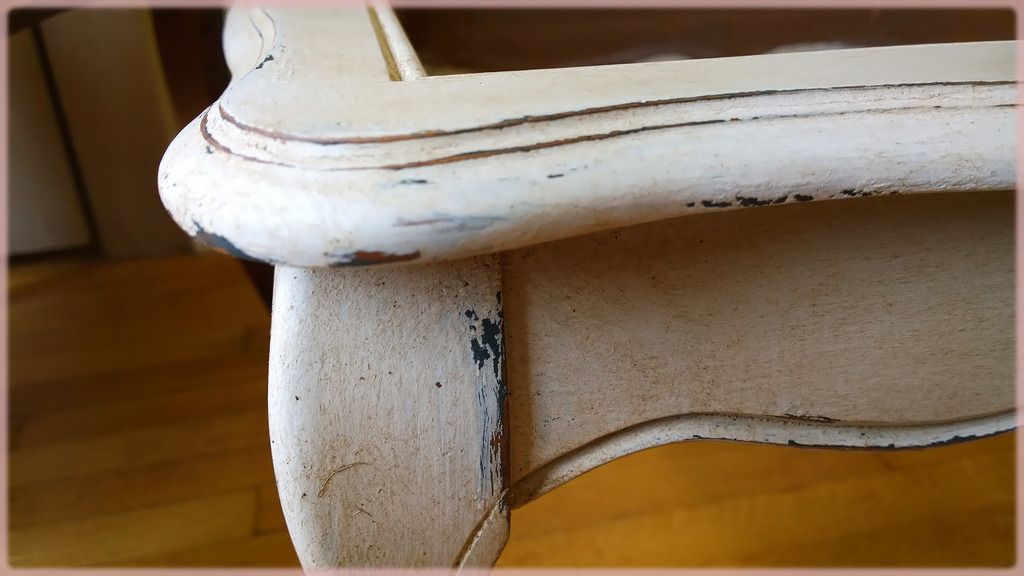
This took me approximately 3 days of drying and painting to complete. I did not like the Old White combination with this navy color so I repainted the trimmings in burnished gold by Ralph Lauren.
I repainted the trimmings in burnished gold.
Overall, the chair is a huge improvement over the original. I made a lot of mistakes along the way, (such as not double taping along the edges to prevent bleeding) but overall the attempt was totally worth it! Would I ever do this again? Probably not on a project of this size, it was nothing short of exhausting. My arms felt like they were going to fall off haha. The MOST difficult part of this sofa were definitely the buttons/creasing and the edgings. I think it accounted for the majority of my time and frustration.
Either way, I taught myself a few things and learned from my mistakes; that’s the whole point right? I can’t wait for my next project!
Here is a list of mistakes and lessons learned along the way:
1. Use a good quality brush, I started off using a cheap brush and this was a mistake. I figured I didn’t want to ruin one of my best pieces but honestly it really helps the paint get into those pesky little areas. Apply with pressure in a circular motion.
2. Spray and spray some more. Water that is: the damper the fabric, the easier it is for the paint to spread and absorb. Don’t fall short on this step!
3. Use hair conditioner if you can’t find fabric medium, it softened up my cushions and made it feel like leather. I couldn’t tell the difference between the parts that were painted with medium and the parts with hair conditioner.
4. I used a satin sheen and I love it, the shimmer gave my cushions a nice luster comparable to its original form.
5. Use painter’s tape and lots of it. I wish i could have gone back and double taped my edgings because some of the paint DOES seep underneath. It’s a huge pain in the rear to take off your tape and find that the color has bled on to the fabric! This is a total problem because painting over painted fabric is a huge chore.
I never thought that I would be spending my time at Home Depot on the weekends. Seriously, these days have been spent roaming the hardware aisle looking at all the sparkly little gems that are oh so beautiful. They look so intimidating, big burly mechanical things that seem to scream “NOT for wussies”. Honestly I find it very exciting. I am ready to take on these bad boys ;).
Palm sander or orbital sander?
I knew that my first expensive investment would have to be a palm sander, I hate having to spend so much time sanding everything by hand. As of right now I don’t really do too much prepping before painting, and although my projects look great without it, I am a perfectionist and was raised with the “do it well or don’t do it at all” mentality. These things won’t just cut my sanding time in half, but will leave a very smooth foundation for my paint as well.
I know a lot of people say that you don’t need to prep for chalk paint, but honestly sanding is so important because you are removing a surface of grime and dirt that has accumulated over the years. It just can’t look its best without sanding.
Saws and more saws!
I was watch American Restoration on the History Channel last night and I learned that you can make your own wood filler by saving your sanding dust and mixing it with glue! How awesome is that? I just love learning new things.
Another thing I discovered is that you can use foam to kneel on. My husband got these egg crate pads from shipping containers at his hospital, they make it bearable for when I am on my knees painting or sanding. It’s fantastic!
Use foam pads to kneel on!
Furniture refinishing really brings out my artsy side, I can literally transform anything with color. Don’t like the color of those cabinets? Paint it! Stains on your dresser? Paint it! Worn out looking table? Paint! The whole world comes together in a canvas in my mind, and I am the paintbrush. It feel good knowing that I no longer contribute to the million tons of garbage that gets dumped into our landfills and oceans every day. This is a good feeling that is also extremely addicting.
I love to cook but I feel that painting is starting to become a much bigger passion. See you at Home Depot!
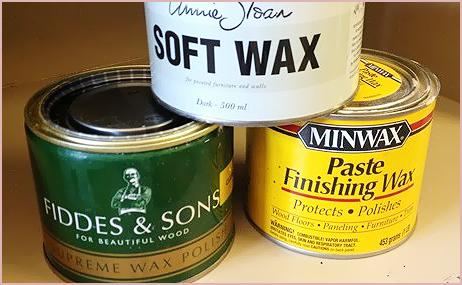
There are so many blogs out there dedicated to Annie Sloan’s clear/dark wax that I decided to write about my own experience with Minwax’s product.
First of all, I have tried both and although AS is easier to use, I personally prefer Minwax due to:
A) Price and availability. One pound of Minwax’s clear wax is $9.98 at Amazon.com AND you can find it at your local department stores. AS’s can be as much as $30 if you live in the United States!
B) Minwax’s dark wax is so beautiful when brushed on, and it goes on very light. Personally I prefer this because I DON’T have to do any wiping with a cloth (I just rub in with a brush). If I want more coverage I do a second coat.
Here’s the thing though, I am not a huge fan of excessive aging and distressing. I like the golden brown look of waxed furniture, and Minwax does a great job with subtlety. Plus it is extremely versatile!
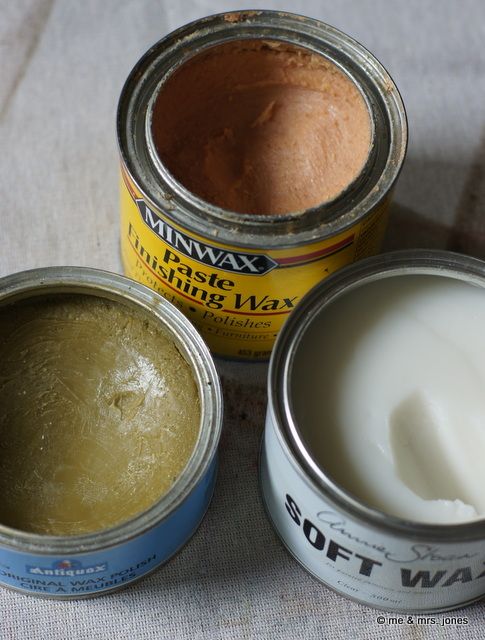
(This was after only one coat of the dark wax! No wiping!)
Instead of having to wipe off excess dark wax (such a waste!), the color blends into the wood and gives it a slight stain. And yes, you DO want to use a brush (flat or round), because it is a real pain to get good coverage with their dark wax when using a cloth.
The “lightness” factor could be a deal breaker for some, and that is understandable. Waxing is a taxing process in itself and who wants to spend more time re-applying coats if you’re anyone but me?
Another possible con is that Minwax’s clear wax has an orange-y tint to it. This isn’t a problem for me because I haven’t noticed a difference when applying on white furniture, and since I usually follow with a dark coat…the truth is, well who cares?
So to summarize, if you are a fan of subtle dark and age-y furniture, go with Minwax. If the orange tint (that isn’t visible upon application anyway) doesn’t bother you, use Minwax’s clear wax. If you are frugal (like me) and don’t care either way, use Minwax!
Beginner Tip: Use a blow dryer on low heat setting to melt the wax before applying.
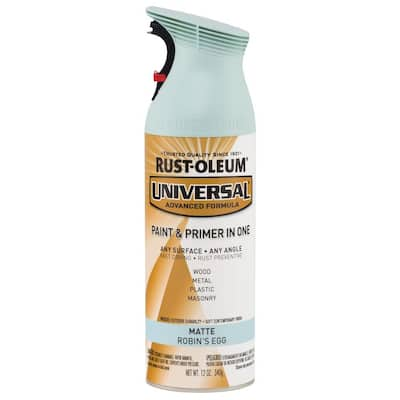
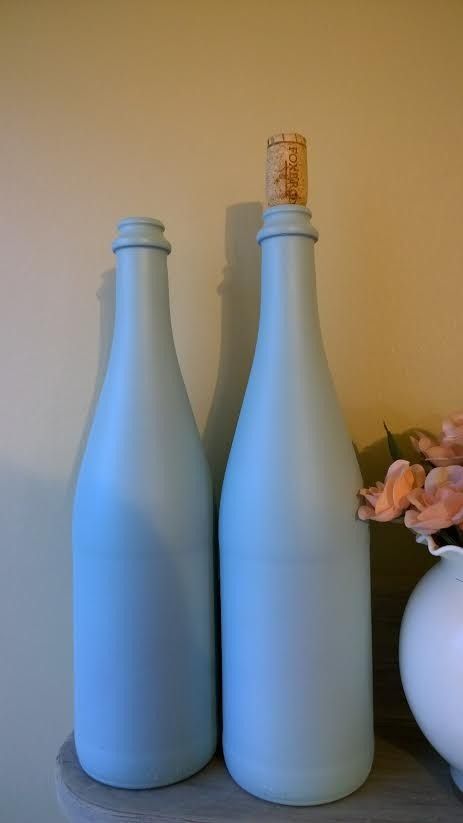
Those of you who love Annie Sloan will be relieved to find that her Duck Egg Blue color can be found at your local Home Depot at a fraction of the cost! Oh, and it comes in a spray can as well!
It’s called Robin’s Egg and I’ve used it on almost everything, including my wine bottles that I absolutely adore.


.JPG)